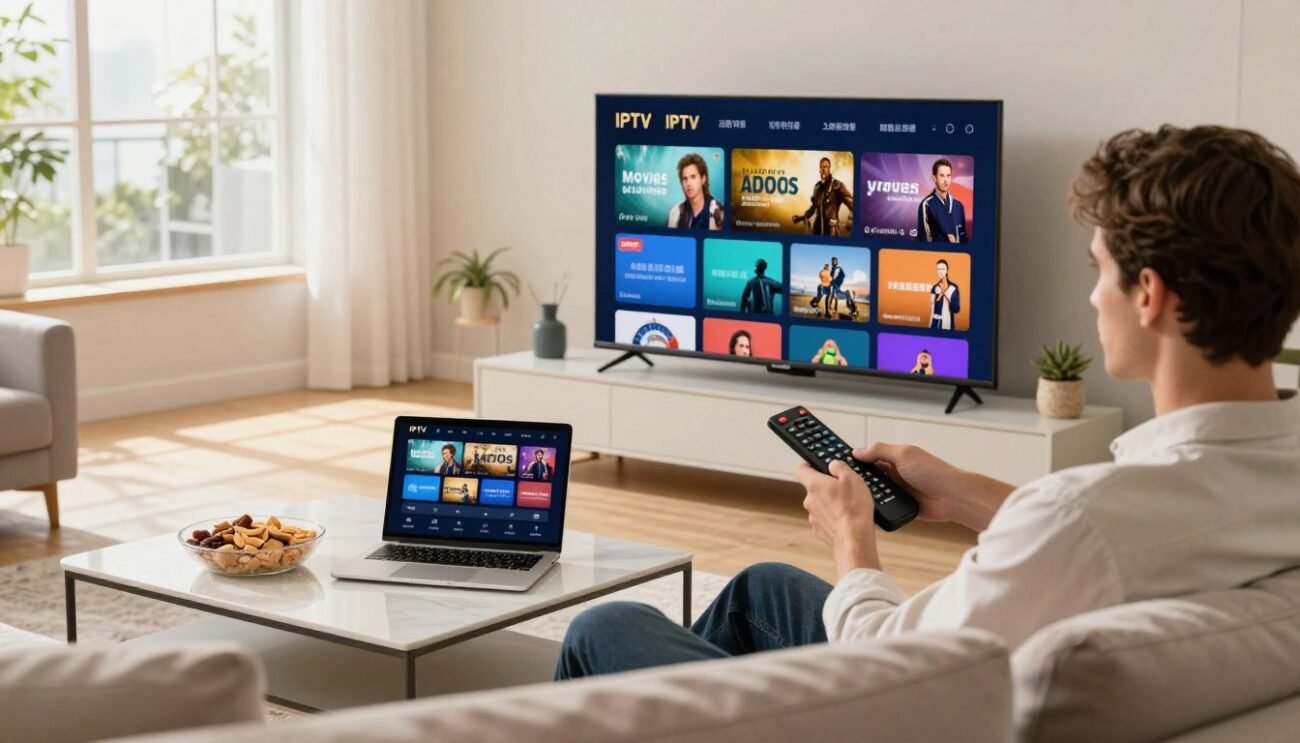

Are you looking for a simple way to enjoy your favorite digital television content right from your desk? Many viewers across the USA are discovering that modern technology makes it easier than ever to access global entertainment.
Setting up IPTV streaming allows you to transform your home office into a personal media hub. This guide will walk you through the essential steps to get everything running smoothly.
We will cover the best software choices and configuration tips for your Windows device. By the end of this tutorial, you will be ready to watch your preferred channels with confidence.
Key Takeaways:
- Selecting the right media player for your PC.
- Configuring network settings for stable playback.
- Ensuring a secure and reliable connection for your IPTV experience.
Understanding the Basics of IPTV Technology
Traditional TV viewing habits are changing. IPTV is becoming a popular choice, using the internet to deliver shows. It’s a big change from old TV methods, where shows came through cables.
IPTV streams content straight to your device over the internet. This is different from traditional TV.
How Internet Protocol Television Differs from Traditional Cable
IPTV vs. Traditional Cable: The main difference is how content is sent. Traditional cable uses cables and broadcast signals. IPTV uses your internet connection.
This change means IPTV can be more flexible and sometimes offer better quality, depending on your internet speed.

The Role of M3U Playlists and EPG Data
M3U playlists are key for IPTV. They have links to different channels and content. EPG (Electronic Program Guide) data shows when shows are on, making it easy to find what you want to watch.
Together, they make watching IPTV easier and more fun. You get a wide range of content.
| Feature | IPTV | Traditional Cable |
|---|---|---|
| Content Delivery | Internet Protocol | Physical Cables and Broadcast Signals |
| Flexibility | High – Can be accessed on various devices with an internet connection | Limited – Tied to physical cable connections |
| Content Quality | Dependent on internet speed; potentially high quality | Generally consistent quality, but can be affected by signal strength |
Knowing these basics helps viewers see what IPTV offers and what it might lack.
Legal Considerations for IPTV Users in the United States
The legality of IPTV services in the U.S. is complex. It’s important to know the difference between authorized and unauthorized services. As IPTV becomes more popular, knowing the legal side is crucial.
IPTV is a flexible alternative to traditional TV. But, the legal rules around IPTV are tricky. They depend on the service provider’s legitimacy and the content they offer.
Distinguishing Between Authorized and Unauthorized Services
Authorized IPTV services have the right licenses and permissions. They pay royalties and follow U.S. copyright laws. This makes them legal to use.
Unauthorized IPTV services don’t have these rights. They often break copyright laws. Using them can lead to legal trouble, like fines.
To stay safe, check your IPTV service provider well. Make sure they’re open about their content and licenses. Legal services will tell you about their compliance and offer good customer support.

Why Using a VPN is Essential for Digital Privacy
Using a legal IPTV service is key to avoiding legal problems. But, digital privacy is also important. A Virtual Private Network (VPN) encrypts your internet and hides your IP address.
This is vital for IPTV users. It keeps your viewing habits private from trackers like ISPs and advertisers. A VPN also lets you access content blocked in your area by making it seem like you’re somewhere else.
When picking a VPN for IPTV, look for one with fast servers and a strong privacy promise. This way, your streaming will be private and smooth.
By understanding the legal side and protecting your privacy, you can enjoy IPTV without worries.
Essential Hardware Requirements for Smooth Streaming
To enjoy seamless IPTV streaming on your Windows PC, it’s crucial to ensure your device meets the necessary hardware requirements. A well-equipped PC not only enhances your viewing experience but also ensures that you can handle the demands of high-definition streaming.
Minimum Processor and RAM Specifications for Windows 11
For a smooth IPTV streaming experience on Windows 11, your PC must meet the minimum hardware specifications. Windows 11 requires a 64-bit CPU with at least1 GHz clock speed and 2 cores. Additionally, your system should have a minimum of4 GB RAM, though8 GB or moreis recommended for smoother performance. A compatible processor is essential; it should be from the Intel 8th Gen or later, or AMD Ryzen 3000 or later series.
Having sufficient RAM is crucial as it allows your system to handle multiple tasks simultaneously without compromising on performance. For IPTV streaming, having at least 8 GB of RAM ensures that your system can handle the streaming software, alongside other background applications, without any lag.

Importance of Stable Ethernet Connections Over Wi-Fi
When it comes to IPTV streaming, a stable internet connection is paramount. While Wi-Fi offers convenience, anEthernet connection is generally more stable and reliablefor streaming purposes. Ethernet connections provide a direct link to your router, reducing the likelihood of interference and signal loss that can occur with Wi-Fi.
Using an Ethernet connection can significantly improve your IPTV streaming experience by reducing buffering and ensuring a consistent stream quality. For high-definition streams, a minimum internet speed of 25 Mbps is recommended. An Ethernet connection can more reliably maintain this speed compared to Wi-Fi, especially in environments with multiple devices connected to the same network.
Moreover, Ethernet connections typically offer lower latency compared to Wi-Fi, which is crucial for real-time streaming. By opting for a wired connection, you can enjoy a more stable and high-quality IPTV streaming experience on your Windows PC.
Selecting the Best IPTV Player for Windows PC
To enjoy seamless IPTV streaming on your Windows PC, it’s key to pick the right player. You have two main options: native Windows apps or emulated Android players. The choice you make can greatly affect your viewing experience.
Comparing Native Windows Apps Versus Emulated Android Players
Native Windows apps are made just for Windows, giving you optimal performance and integration. They usually offer a smoother experience and are more stable. Emulated Android players, like those using BlueStacks, let you run Android apps on your Windows PC. This opens up more IPTV player options from the Android platform.
When choosing, think about these points:
- Ease of use and user interface
- Availability of features like EPG support and multi-screen capabilities
- Stability and performance on your specific hardware
- Compatibility with your IPTV service provider’s needs
Key Features to Look for in a Media Player
Whether you pick a native Windows app or an emulated Android player, look for these key features in an IPTV player:
- Reliable playback of various stream types, including M3U and M3U8
- Support for Electronic Program Guides (EPG) to help you navigate channels and schedules
- Customization options for personalizing the user interface and experience
- Regular updates and good customer support from the developer

By carefully looking at these points, you can find an IPTV player that meets your needs now and in the future. This ensures a top-notch streaming experience on your Windows PC.
Downloading and Installing TiviMate via Android Emulators
Downloading TiviMate via Android emulators is easy. It lets you watch IPTV on your Windows PC. Android emulators like BlueStacks make it possible to run Android apps on your desktop.
Setting Up BlueStacks for Optimal Performance
To set up BlueStacks, follow these steps:
- Download and install the latest version of BlueStacks from its official website.
- Launch BlueStacks and sign in with your Google account to access the Google Play Store.
- Search for TiviMate in the Google Play Store and install it.
- Adjust BlueStacks settings for better performance by allocating more RAM and CPU resources.
Configuring TiviMate Settings for Desktop Use
After installing TiviMate, configure it for optimal desktop use:
- Launch TiviMate from within BlueStacks.
- Input your IPTV playlist URL and EPG data if required.
- Adjust the settings to suit your viewing preferences, such as aspect ratio and buffering options.
- Save your settings and start enjoying your IPTV content on your Windows PC.
By following these steps, you can successfully download, install, and configure TiviMate using BlueStacks. This ensures a smooth IPTV viewing experience on your desktop.
Setting Up IPTV Smarters Pro on Windows
Setting up IPTV Smarters Pro on your Windows PC is easy and makes streaming better. It’s a top pick for IPTV fans because it’s easy to use and has lots of features.
To start, download the official Windows version of IPTV Smarters Pro. Make sure to get it from a trusted source to stay safe.
Downloading the Official Windows Version
Here’s how to download IPTV Smarters Pro:
- Go to the official IPTV Smarters Pro website.
- Find the download section.
- Pick the Windows version and click the download link.
- After downloading, run the installer and follow the instructions to install it.
Inputting Your Service Credentials Correctly
After installing, you’ll need to put in your service credentials to watch your IPTV content.
- Open IPTV Smarters Pro on your Windows PC.
- You’ll see a prompt to enter your IPTV service provider details, like username and password.
- Make sure to enter the info correctly to avoid login problems.
- After logging in, you can explore and customize your viewing experience.
| Step | Description |
|---|---|
| 1 | Visit the official IPTV Smarters Pro website. |
| 2 | Download the Windows version. |
| 3 | Install the application. |
| 4 | Input your IPTV service credentials. |
Configuring VLC Media Player for IPTV Streams
Setting up VLC Media Player for IPTV streams is easy and makes watching shows better. It’s a top pick for IPTV because it’s flexible and has lots of features.
To get started with VLC for IPTV, you need to know two main things. First, how to add M3U files to the playlist. Second, how to tweak cache settings to cut down on buffering. Let’s explore these steps.
Loading M3U Files into the Playlist Interface
Adding your IPTV playlist to VLC is the first step to enjoy your favorite shows. Here’s how:
- Open VLC Media Player on your Windows PC.
- Go to the Media menu and choose Open File…
- Find your M3U file, pick it, and hit Open.
- VLC will add the M3U file to its playlist, showing all your channels.
Adjusting Cache Settings to Reduce Buffering
Buffering can be a big problem with IPTV. Changing VLC’s cache settings can help fix this.
To change the cache settings:
- Go to Tools > Preferences in VLC.
- In the Preferences window, click All under Show settings at the bottom.
- Find Input/Codecs and the Advanced section.
- Up the File cache (ms) and Network caching (ms) values (like to 1000 ms or more) to boost the cache.
- Hit Save to save the changes.
By following these steps, you can make your IPTV streaming on VLC Media Player much better. The right setup means less buffering and smoother watching, perfect for live TV and streaming.
Obtaining and Managing Your M3U Playlist Files
M3U playlist files are key for IPTV streaming. They hold links to your favorite channels. Knowing how to manage them is crucial for a smooth viewing experience.
To begin, you need to get these files. Your IPTV service provider will give you an M3U file or a link to it. Make sure to download or access these files from trusted sources to stay safe and legal.
How to Safely Download and Store Playlist Files
Here are tips for downloading M3U playlist files safely:
- Download only from trusted places, like your IPTV service provider’s official site or approved distributors.
- Be careful with files from unknown sources, as they might have malware or unauthorized content.
- Keep your M3U files in a safe spot on your Windows PC, like a folder with a password.
Updating Links to Prevent Broken Streams
Links in your M3U playlist files can break over time, causing service interruptions. To avoid this:
- Check with your IPTV service provider for updates to your M3U playlist files regularly.
- Use IPTV players that can automatically update M3U playlist links or refresh them for you.
- Keep a backup of your M3U files and update them often to keep your IPTV service running smoothly.
By following these steps, you can enjoy uninterrupted IPTV streaming on your Windows PC.
Integrating Electronic Program Guides for Better Navigation
Improving your IPTV experience on Windows PC means adding Electronic Program Guides (EPG). These guides make it easy to find shows and channels. They offer a simple way to navigate through your TV options.
To add EPG to your IPTV, focus on two key steps. First, find good XMLTV sources. Then, manually link your channels to the EPG data.
Finding Reliable XMLTV Sources
XMLTV sources are key for a good EPG. Good sources keep your guide up-to-date and correct. To find a reliable source, try these:
- Visit online forums and communities for IPTV user tips.
- Look for official XMLTV sources from your IPTV provider.
- Check out well-known IPTV websites for XMLTV links.
Make sure the XMLTV source works well with your IPTV player. It should also cover all the channels you have.
Mapping Channels to EPG Data Manually
Once you have a good XMLTV source, map your channels to the EPG data. This step links your M3U playlist channels to the EPG data. Manual mapping takes time but is precise.
To map channels manually:
- Open your IPTV player’s EPG settings.
- Load the XMLTV file into the player.
- Match each channel in your M3U playlist to its EPG data by choosing the right channel ID.
By doing these steps, you’ll get a better IPTV experience on your Windows PC.
Optimizing Network Settings for High-Definition Playback
To get the best out of IPTV streaming on your Windows PC, tweaking your network settings is key. A well-set network means your IPTV streams play smoothly, without any hiccups.
Adjusting your Windows network adapter settings is a big step in improving your IPTV quality. This tweak can make a big difference in how well your streams play.
Adjusting Windows Network Adapter Settings
To tweak your network adapter settings, start by accessing your adapter’s properties. You can find this in the Device Manager. Make sure your network adapter drivers are current, as old drivers can cause problems.
Also, play with the advanced settings of your adapter. Tweaking settings like Large Send Offload and Interrupt Moderation can boost streaming. Turning off things you don’t need can also cut down on delays and make your network run better.
Managing Background Processes to Free Up Bandwidth
Another important step is managing background processes. These can use up a lot of bandwidth, making your IPTV streams lag or buffer.
To handle background processes well, open the Task Manager and sort apps by network use. Find and close apps that use a lot of bandwidth but aren’t needed. This frees up more bandwidth for your IPTV, making your viewing experience better.
- Close unnecessary applications and background processes.
- Limit the bandwidth usage of non-essential applications.
- Consider setting up Quality of Service (QoS) settings on your router to prioritize IPTV traffic.
By following these tips, you can greatly improve your IPTV experience on your Windows PC. Enjoy your high-definition content without any breaks.
Securing Your Connection with a Reliable VPN
Using a VPN for IPTV is key to keep your viewing private and avoid geo-blocks. Your ISP and others can see what you’re watching. A VPN for IPTV encrypts your data, keeping your viewing habits secret.
A VPN also lets you get around geo-blocks. This is great for those who want to watch international channels or content not available locally.
Choosing a VPN Provider with High-Speed Servers in the USA
For IPTV, pick a VPN with high-speed VPN servers in the USA. Fast servers mean no buffering or lag, making your streams smooth.
- Find VPNs with lots of servers in the USA.
- Make sure the VPN has a good track record for speed and stability.
- Look for VPNs that specialize in streaming and IPTV.
Top VPNs for IPTV in the USA include ExpressVPN, NordVPN, and Surfshark. They offer fast speeds and strong security.
Configuring Split Tunneling for IPTV Traffic
Split tunneling lets you pick which apps or services use the VPN. This can help manage your internet bandwidth better.
By only using the VPN for IPTV, other online activities won’t be slowed down. This is handy if your VPN is slower than your regular internet.
To set up split tunneling, go to your VPN client’s settings. Choose the IPTV app or service you want to use the VPN for. The steps will depend on your VPN and device.
Troubleshooting Common Playback Errors and Buffering
Fixing IPTV playback problems on Windows PCs is key for a smooth watch. Errors and buffering can ruin your streaming. But, finding and fixing these issues is easy with the right steps.
First, know what causes these problems. Issues can stem from network congestion, server problems, or app/player issues.
Identifying Network Congestion Versus Server Issues
Start by figuring out if the problem is with your network or the IPTV server. Network congestion happens when your internet is too busy. Server issues are problems with the IPTV service provider’s setup.
Use online tools to check your internet speed. If it’s good, the problem might be with the IPTV server.
| Issue | Symptoms | Potential Solution |
|---|---|---|
| Network Congestion | Buffering, slow loading times | Upgrade your internet plan, limit device usage |
| Server Issues | Playback errors, server not responding | Contact your IPTV provider, check for server status updates |
Clearing App Cache and Data to Resolve Glitches
Clearing the cache and data of the IPTV app or player can fix issues. This removes temporary files that might be causing problems.
For apps like TiviMate or IPTV Smarters Pro, clear cache and data in the app’s settings. Or, uninstall and reinstall. Remember to save any important settings or login info before doing this.
By taking these steps, you can often fix playback errors and buffering. This makes your IPTV streaming on Windows PCs smoother.
Managing Multiple IPTV Subscriptions on One Device
IPTV is getting more popular, and managing many subscriptions on one device is key. This is especially true for those with many IPTV providers or different plans for different content.
Using Multi-Playlist Features in Modern Players is vital for managing multiple IPTV subscriptions. Players like TiviMate and IPTV Smarters Pro have multi-playlist features. These features let users manage many M3U playlists in one app. It makes switching between services or plans easier.
Using Multi-Playlist Features
To use multi-playlist features well:
- Open your IPTV player and go to the playlist management section.
- Add multiple M3U playlists by entering the URLs or uploading files.
- Organize playlists into categories or folders for easy access.
Organizing Favorites and Categories
Organizing IPTV content into favorites and categories makes watching more enjoyable. Most modern IPTV players let users create custom categories for their favorite channels or content types.
To organize your IPTV content:
- Find your most-watched channels or content types.
- Create categories or folders in your IPTV player for these favorites.
- Put the relevant channels or content in these categories.
By managing multiple IPTV subscriptions and organizing content, users can have a better viewing experience on their Windows PC.
Advanced Customization Options for Power Users
To get the most out of your IPTV service, exploring advanced customization options is key. These options let power users tailor their viewing experience to their liking. This makes their IPTV setup more functional and visually appealing.
Customizing User Interface Themes and Layouts
Personalizing the user interface is a major part of IPTV customization. Modern IPTV players offer many themes and layouts to choose from. You can change the color scheme, font size, and even how channels and menus are arranged.
Key UI Customization Options:
- Theme selection: Pick from various pre-designed themes to change your IPTV player’s look and feel.
- Layout adjustments: Rearrange your favorite channels or categories to suit your preferences.
- Custom icons and logos: Upload your own icons and logos for a more personal touch.
Think about your viewing environment when customizing the UI. For example, a high contrast theme might be better for watching in a bright room.
Setting Up Parental Controls and Content Filtering
Setting up parental controls and content filtering is also crucial. These features are vital for households with kids. They let parents block certain channels or content based on maturity levels.
Parental Control Features to Consider:
| Feature | Description | Benefit |
|---|---|---|
| Channel Locking | Lock specific channels with a PIN | Prevents unauthorized access to mature content |
| Content Filtering | Filter content based on ratings or categories | Ensures children only access appropriate content |
| Time Restrictions | Limit IPTV access to certain times of the day | Helps manage screen time and viewing habits |
By using these advanced customization options, power users can greatly improve their IPTV experience. It becomes more enjoyable and tailored to their specific needs.
Maintaining Privacy and Security While Streaming
Streaming IPTV on your Windows PC is fun, but keeping your online safety and privacy is key. With more people using IPTV, making sure your connection is secure is more important than ever.
Being careful with links and sources is crucial for security. Avoiding malicious links and phishing sites helps keep your personal data safe from unauthorized access.
Avoiding Malicious Links and Phishing Sites
When you download M3U playlists or use IPTV services, watch out for suspicious links. These could lead to phishing sites that try to steal your login or credit card info.
- Always check if a website is real before sharing personal info.
- Make sure the URL starts with HTTPS and has a lock icon for a secure connection.
- Don’t click on links from unknown sources or emails that ask for your login details.
Keeping Your Software Updated to Patch Vulnerabilities
Keeping your software up to date is also vital for IPTV security. Updates often fix security holes that hackers could use.
Make sure your:
- Operating System (like Windows 11) is always updated.
- IPTV player and software are at the latest version.
- Antivirus is running and updated to fight malware.
By following these tips, you can greatly improve your online security. This way, you can enjoy a safer IPTV streaming experience.
Conclusion
Watching IPTV on Windows PC in the USA can be easy with the right setup. Knowing the basics of IPTV and choosing the right hardware and software is key. This way, users can enjoy top-notch streaming.
Important points from this guide include picking authorized IPTV services and setting up your network right. Also, using a reliable VPN is crucial for security. The right IPTV player and managing M3U playlists well are also important steps.
By following this guide, users can make their IPTV streaming on Windows PC better. This summary shows the need for a stable internet, proper setup, and regular maintenance. These steps help keep the service running smoothly.
With these tips, viewers can now enjoy their favorite shows and movies with better quality and safety. This marks the end of our guide on IPTV on Windows PC.